The GameBoy Phone Project Posted on 01-07-11 04:53 pm
What is about to follow is a project not based on practicality, nor on the idea that such an idea would produce a device with everyday functionality. Rather, this project was built on the foundation of possibility, and without further unnecessary introduction, we present to you The Gameboy Phone Project.
Introduction
The idea for this project came when a thought entered my mind: Sony is making a Playstation phone, Microsoft's Windows Phone 7 has been referred to as the "Xbox Phone", so why shouldn't Nintendo have a phone?
This coupled with another thought-we, at Windows Phone Hacker, haven't quite been living up to our names. Sure, we've been working on providing tweaks, special apps and themes, tutorials on changing your operating system, and other software-related hacks, but we've hoped to provide something deeper-something that screams hack.
Shortly later, the idea was born-Get an old 8525, buy a Gameboy Advance case, and turn the two into a fully functional Gameboy Phone running Windows Mobile.
Materials
An HTC 8525, available for around $50 on eBay
A Gameboy Advance case, around $5 on eBay from Hong Kong
Tri-reme screw driver, Torex screw driver, and Phillips screw driver.
Dremel Rotary tool
Step 1: Disassemble the HTC 8525
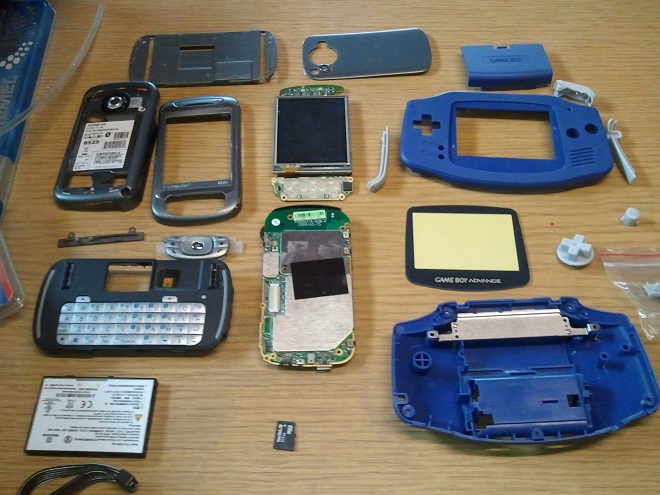
Disassembling the phone was fairly easy, as I had done so on multiple occasions. Unscrew the Torex screws on the back, then pry apart. In this project, I only needed two pieces-the mainboard and the screen, so the keyboard and chassis were set aside. Below is a shot of all the materials laid out:
Step 2: Preparing the case
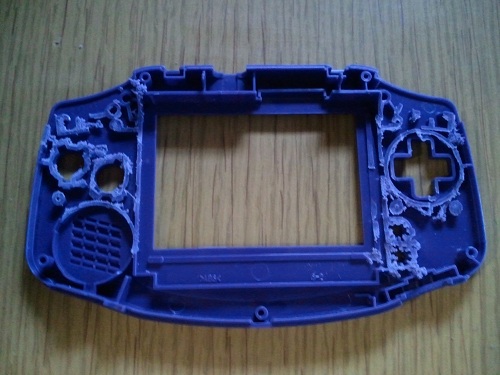
This was possibly the most tedious process of the whole project. Thankfully, the phone screen is almost exactly the size of the original Gameboy Advance screen, which makes fitting the screen fairly simple. I did not have time to plan schematics for the buttons in the first prototype, but I hope to find a way to get these working later on. The hard part, however, is cleaning out all the plastic designed to hold the original circuitry. This was taken care of with the help of a Dremel:
It took several tries to get right, and even the battery case had to be removed, but in the end,the two circuit boards gave in and fit in smugly.
Step 3: Screwing it all together
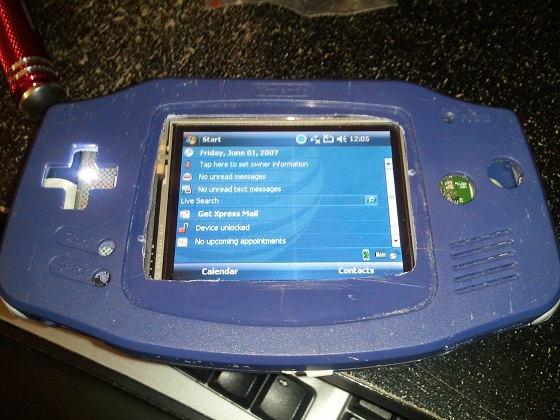
Not a particularly easy task, but doable after some tries. The screen board was connected to the mainboard, and the battery was taped in place on the bottom. The two boards sandwiched together into the case, and were screwed in tightly. All together, the first startup looked like this:
Of course, the work is not done: There's no buttons, and the lines of the screen can be seen clearly. And software wise, there's almost nothing on the device that will give any Gameboy feel. Basically speaking, it's aesthetics time.
Step 4: Final outside preparations
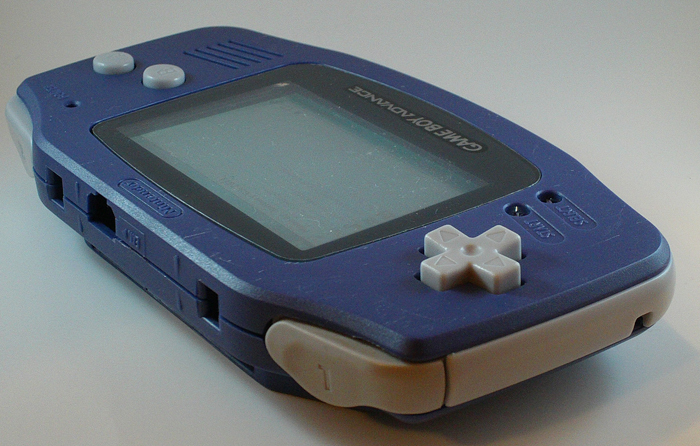
The GameBoy Advance housing came with a cover for the screen, complete with the stylish GameBoy logo. This also helps remove the harsh edges seen around the screen. Aside from that, the buttons needed to be taped in, which took more practice than actual difficulty. In finishing, the device looked something like this:
Last, but not least: Software preparations
We really wanted to bring in the true GameBoy feel into the software of the device, and we did this in a variety of small ways. First of all, we took the original booting animation, and applied it to the startup GIF animation of the phone. The sound track was also applied to the AT&T 3G rocket noise, making the device start up with an authentic feel. See the video for a closer look.
We also wrote special software to keep the screen in landscape mode, provide custom notifications, and handle a few behind the scenes tasks. And, of course, we found Mario-based ringtones and notification sounds.
The last software customization was the implementation of the PocketGBA emulator, which allowed us to play real GBA roms on the phone itself. A demonstration is seen in the video, and it really helped complete the phone.
Wrapping Up
While it's still an early prototype, we succeeded in completing a task Nintendo is yet to do: We created a GameBoy Phone, running Windows Mobile and enabled to play real GameBoy roms. We hope you enjoy this project, and let us know your thoughts below. If you have any questions, be sure to let us know-this project took a total of about two weeks from preparation to finished project, and around four hours of workshop time. Was it worth the sweat? We think so.
Photos
Click to view full sized
Video
Startup Animation: 0:18
Phone call: 1:18
Internet Explorer: 1:49
Texting/SMS: 3:16
Gameboy Emulation: 4:34
A special thanks goes to my brother for his help on the project!